
Olive – Custom Category Page Templates (Pro)
Olive now includes 2 optional custom category page templates. To use them, you'll need Hooked Elements, which is a Kadence Theme Pro feature. Without Kadence Pro, your site will simply display the default WordPress category archive layout as it always has.
This guide will walk you through how to assign a custom category template to a category archive page. Before you begin, make sure the Kadence Theme Kit Pro plugin is installed and activated and that your license key is active.
How to create and assign an element
-
Navigate to Appearance > Kadence and under Pro Addons, toggle on Hooked Elements
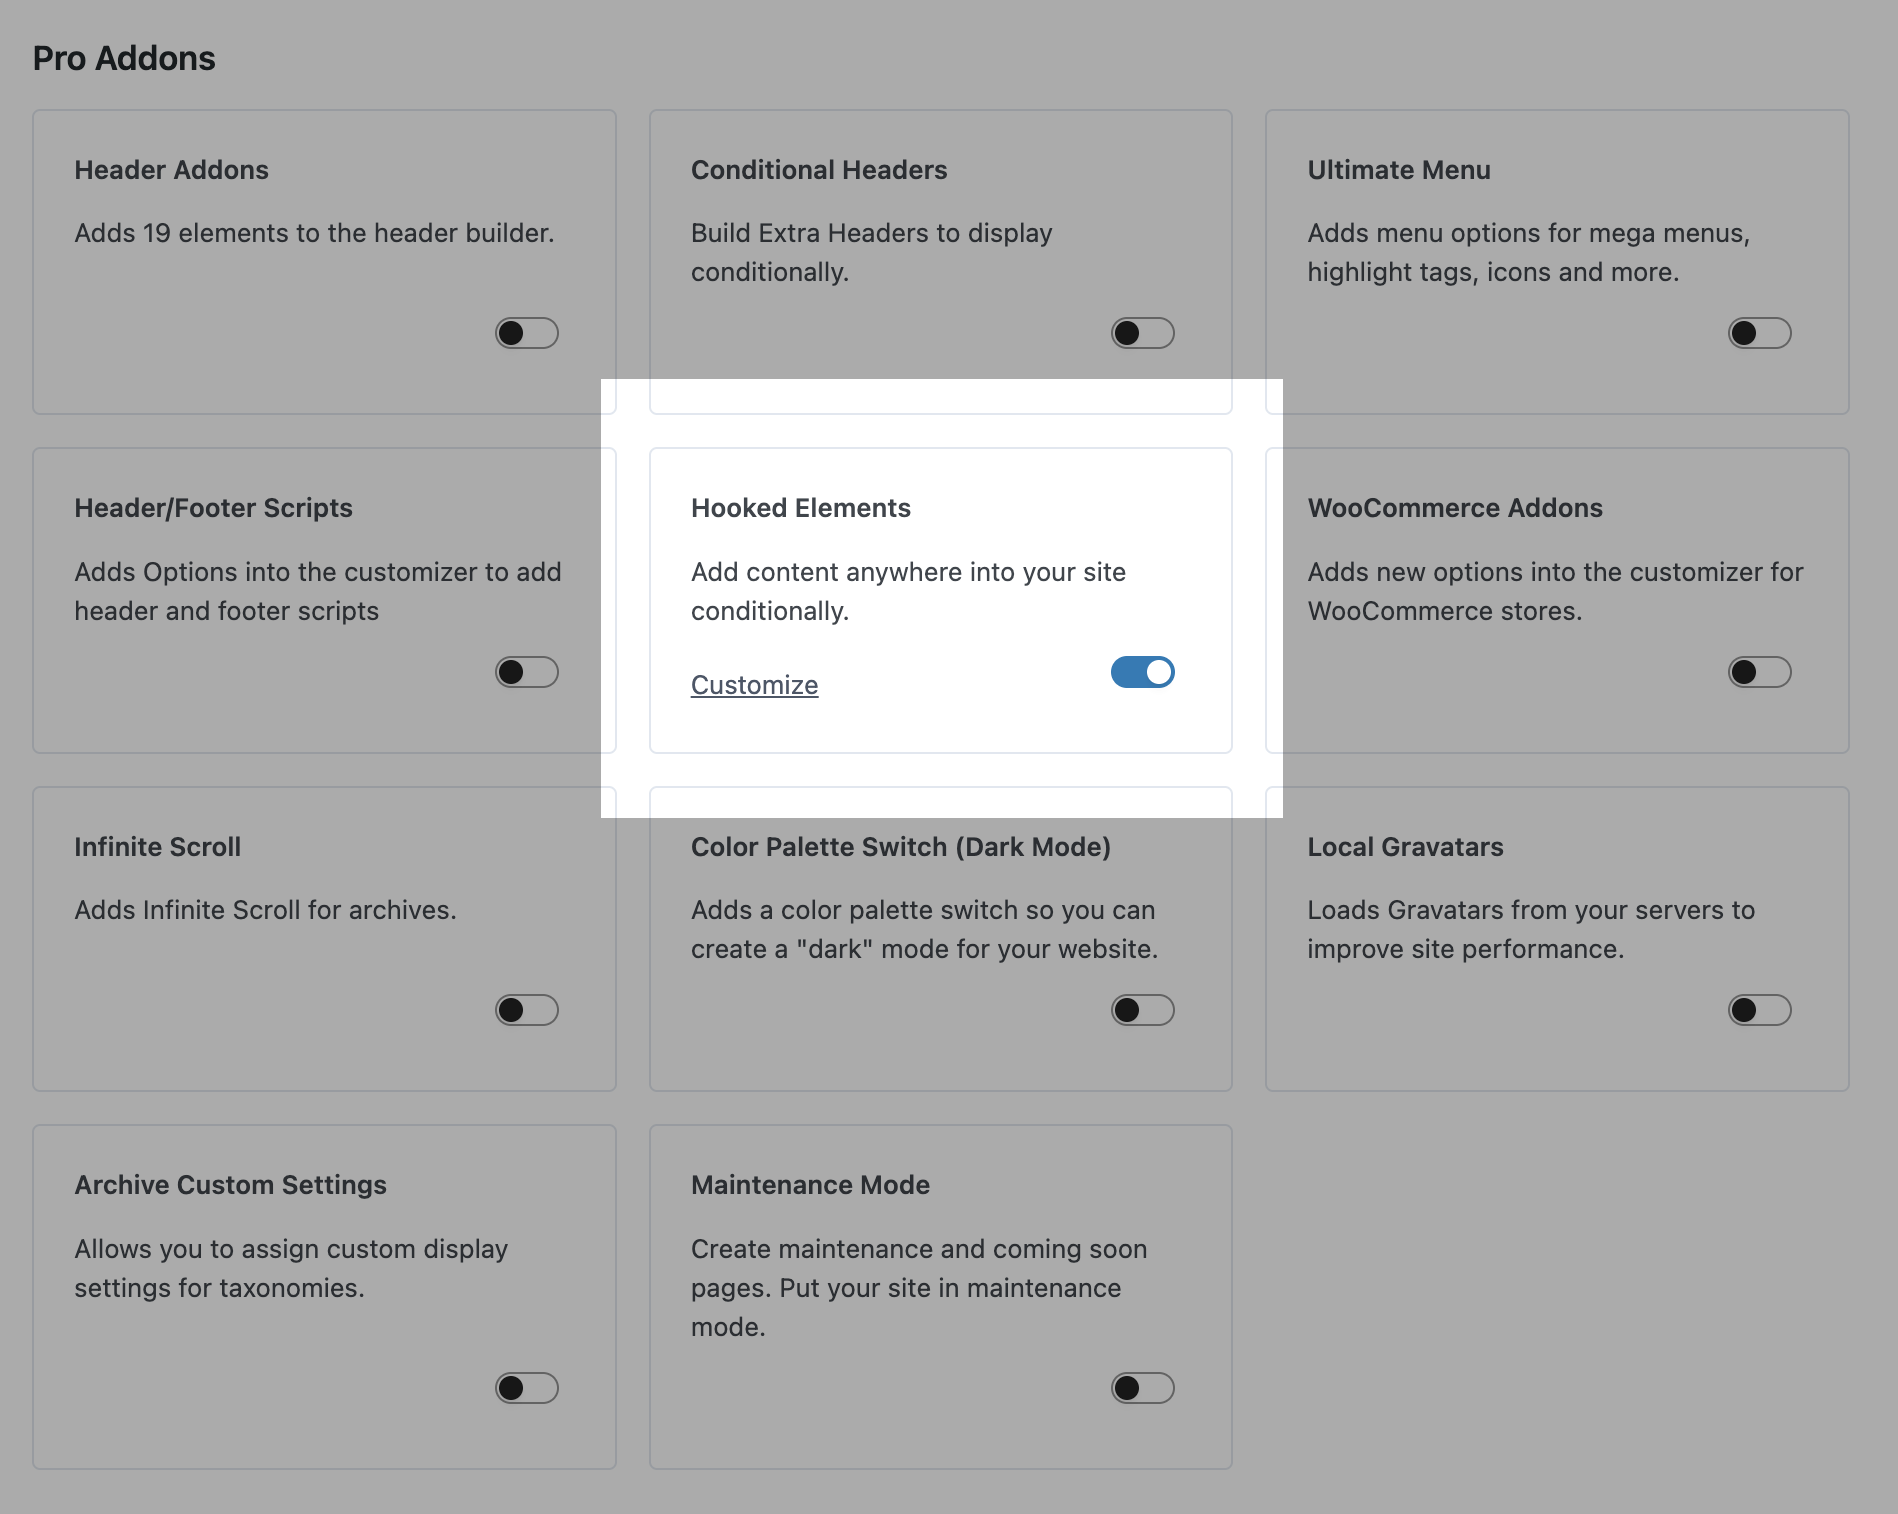
- You should now see Elements listed under Appearance > Elements. If not, refresh the page.
-
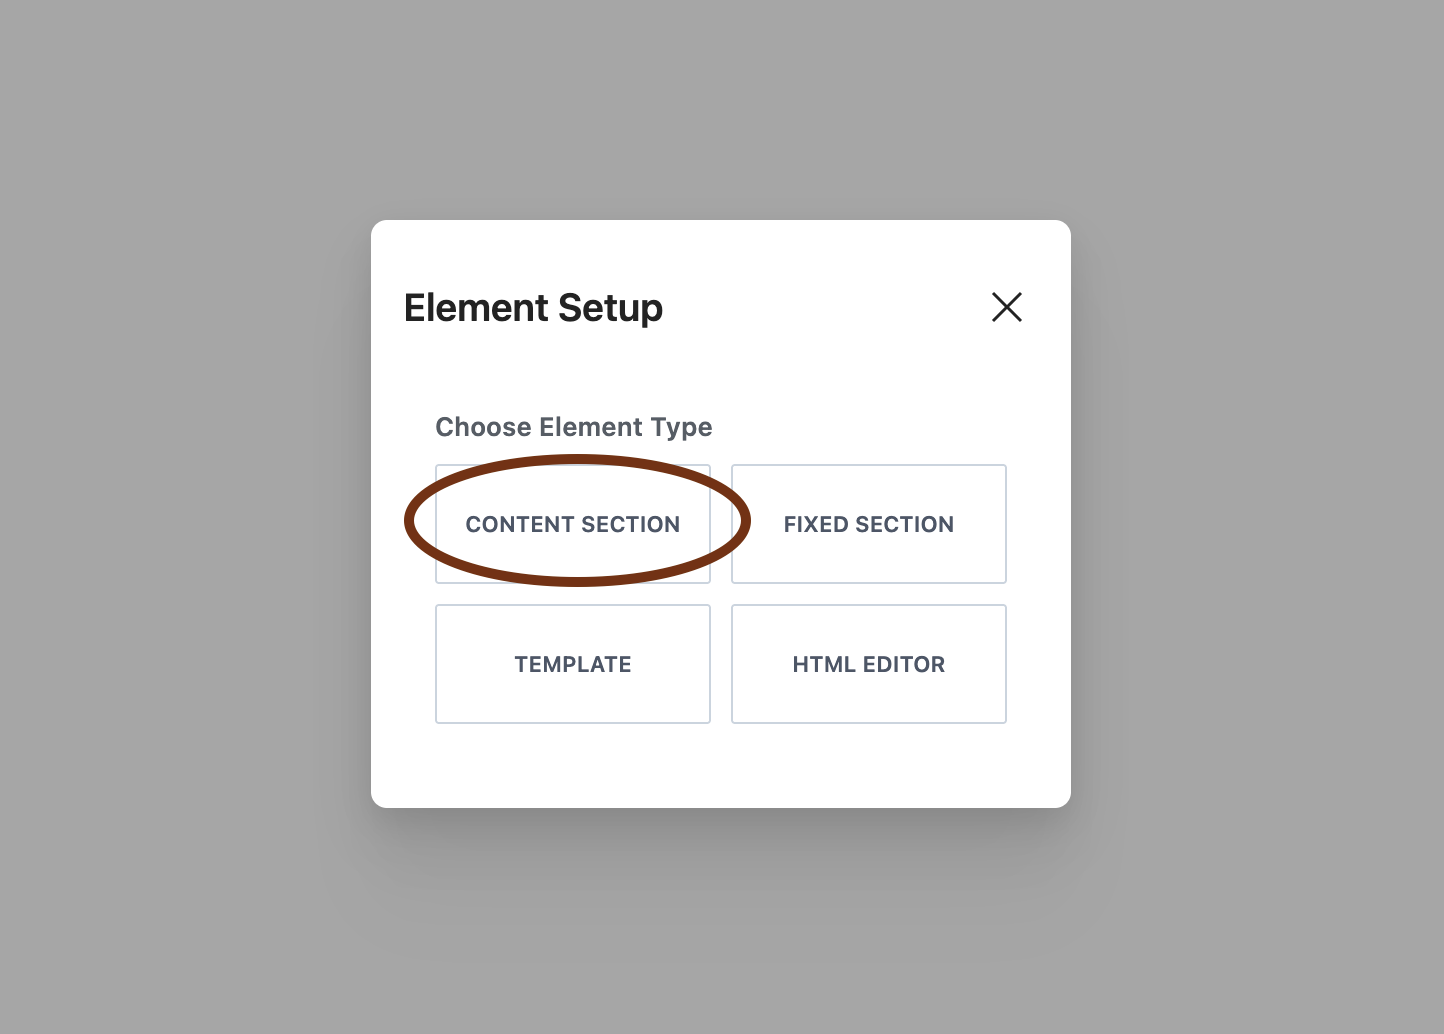
Click Add New Element, then choose Content Section.
- Give your element a title – whatever you'd like. For example, if you're assigning this element to a Vegan category page, you might name it "Vegan – Custom Category Page."
- At the top of the page, click the Design Library to open the Olive block collection and choose Olive. Filter by Full Pages on the left, then find one of the category page templates and click to insert it. You should see them at the very top.
- Once inserted, click the Element Settings icon in the top right of the editor and make the following adjustments:
- Placement: Custom Hook (located at the very bottom of the list)
-
In the custom hook field, paste the following:
kadence_before_archive_content(This hooks our content between the title area and the post archive.)
- Below that, open the Display Settings tab.
- Under Show On, choose Category Archives.
- Under Select Category Archive By, choose Individually, then select your category from the dropdown. Here's what mine looks like when I'm finished:


That's it!
From here, you can edit the content to adjust any colors, assign your own categories to the Posts block, add your own copy, videos, and more.
Repeat these steps for any additional category pages you want to customize.
Adjusting large featured post colors

Unlike the large featured posts you're familiar with on the homepage, these featured posts are pulled in from the Posts block and require custom CSS.
To adjust the "Featured Recipe" subtitle, content background color, and divider color on the large featured post, you'll need to make some adjustments.
- Select the Row block (the area outside of the post) and open the Advanced tab in the block settings on the right
- Open the Custom CSS section and then click the Edit in Modal button at the top. This will open a window with the custom code inside so it's easier to edit!
-
The top 3 blocks of code are what you'll make adjustments to, specifically the lines where the arrows are pointing:
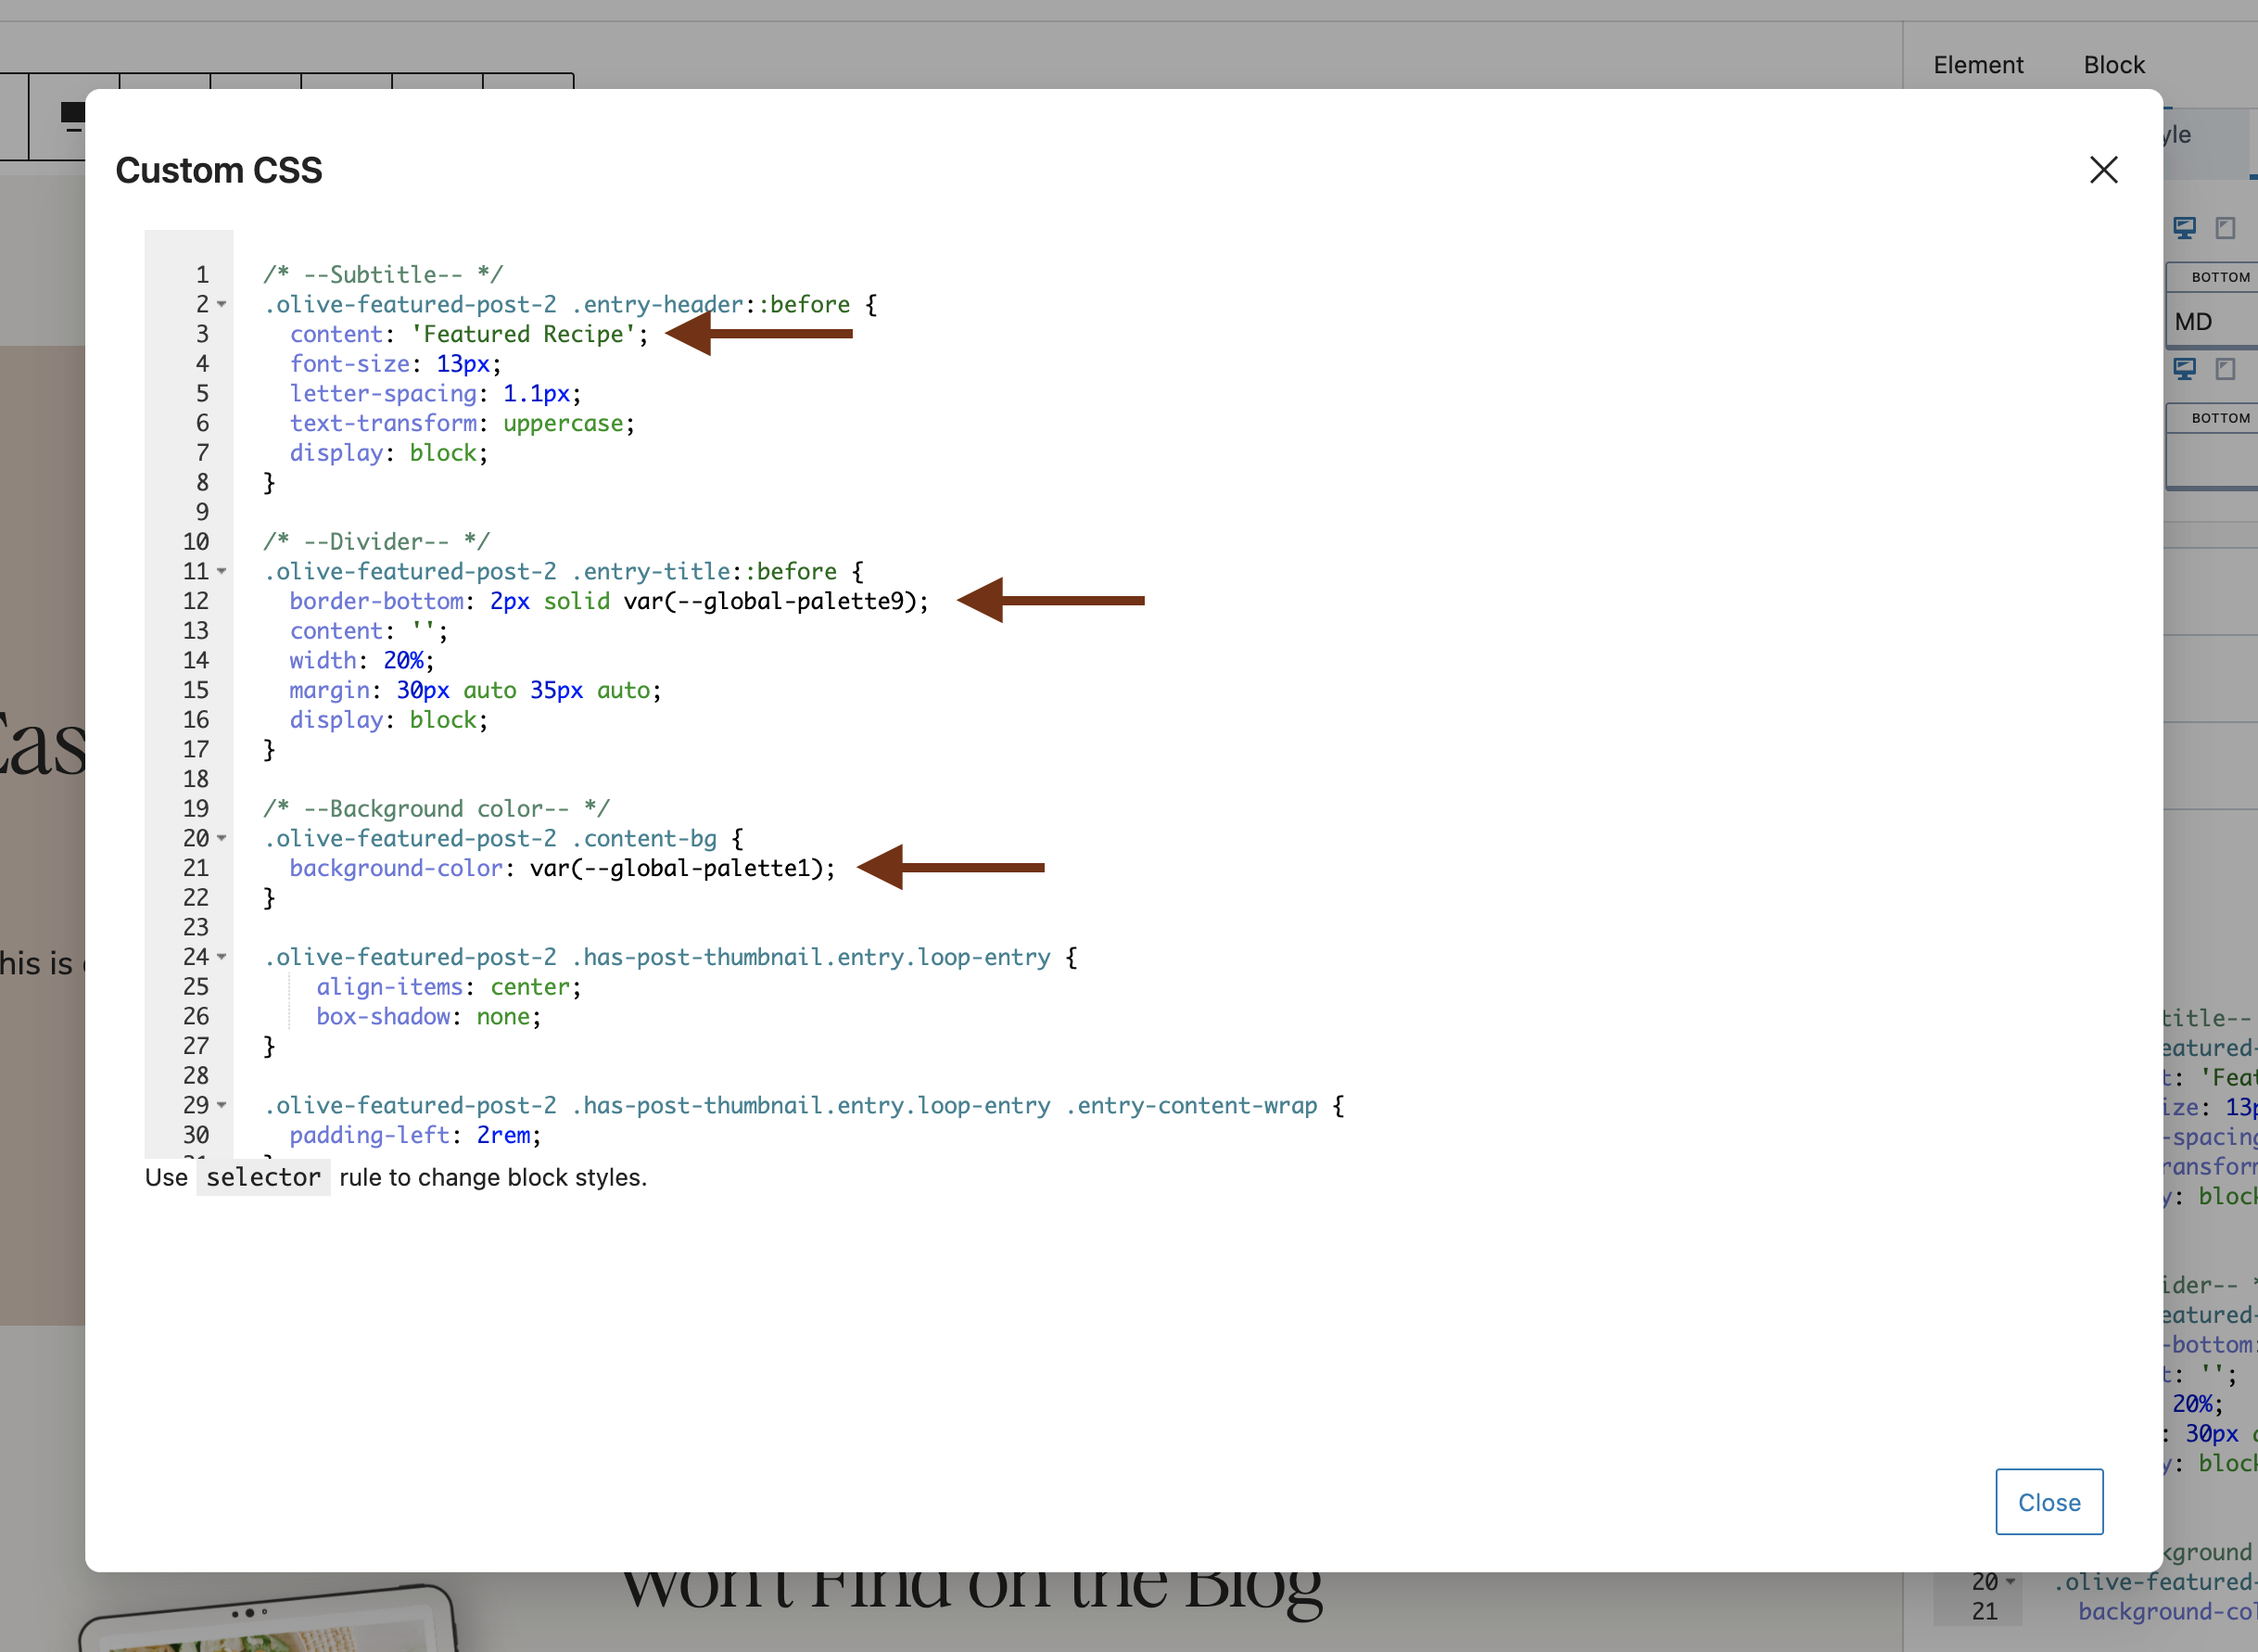
Under Subtitle, change the text
Featured Recipeto whatever you want the subtitle text to say- Under Divider, adjust the color palette number (1-10 is available). For example, if it says
global-palette9which is normally the white color in your color palette, you could change it toglobal-palette7- Under Background Color, you'll adjust the color palette number again. It may be set to
global-palette-1, but you could change it toglobal-palette-2if you'd like - When you're finished, click close. You should see your changes in the editor.

Limiting the element to page 1 only
By default, your element will display across all paginated versions of the category archive – so it will appear on /page-2/ , /page-3/ and so on. If you'd prefer it only shows on the first page, you can add the following PHP snippet using a code snippets plugin (such as WPCode or Code Snippets).
add_filter( 'kadence_element_display', function( $display, $element ) {
if ( is_paged() ) {
    return false;
}
return $display;
}, 10, 3 );
Set this to "display on the front end".