
Kadence - How to Set Up Your Form with Mailchimp
Let's go over how to add a Mailchimp signup form to your site!
Jump to: Option 1: Embedded form
Jump to: Option 2: Use a plugin
Please note that every email marketing service is different, so forms and layouts will vary, and each way that they code and style their forms is different. This means that your form will not always look like the demo form you see on the theme demo site. Form customization is not included in theme support.
Option 1: Embedded form
Note: Just a heads up that this guide will get your form working on your site, but Mailchimp doesn't allow you to customize the design and layout without custom coding (even if you have a paid account). If you want your form to match a little closer to your theme styles, you should consider use the plugin method instead.
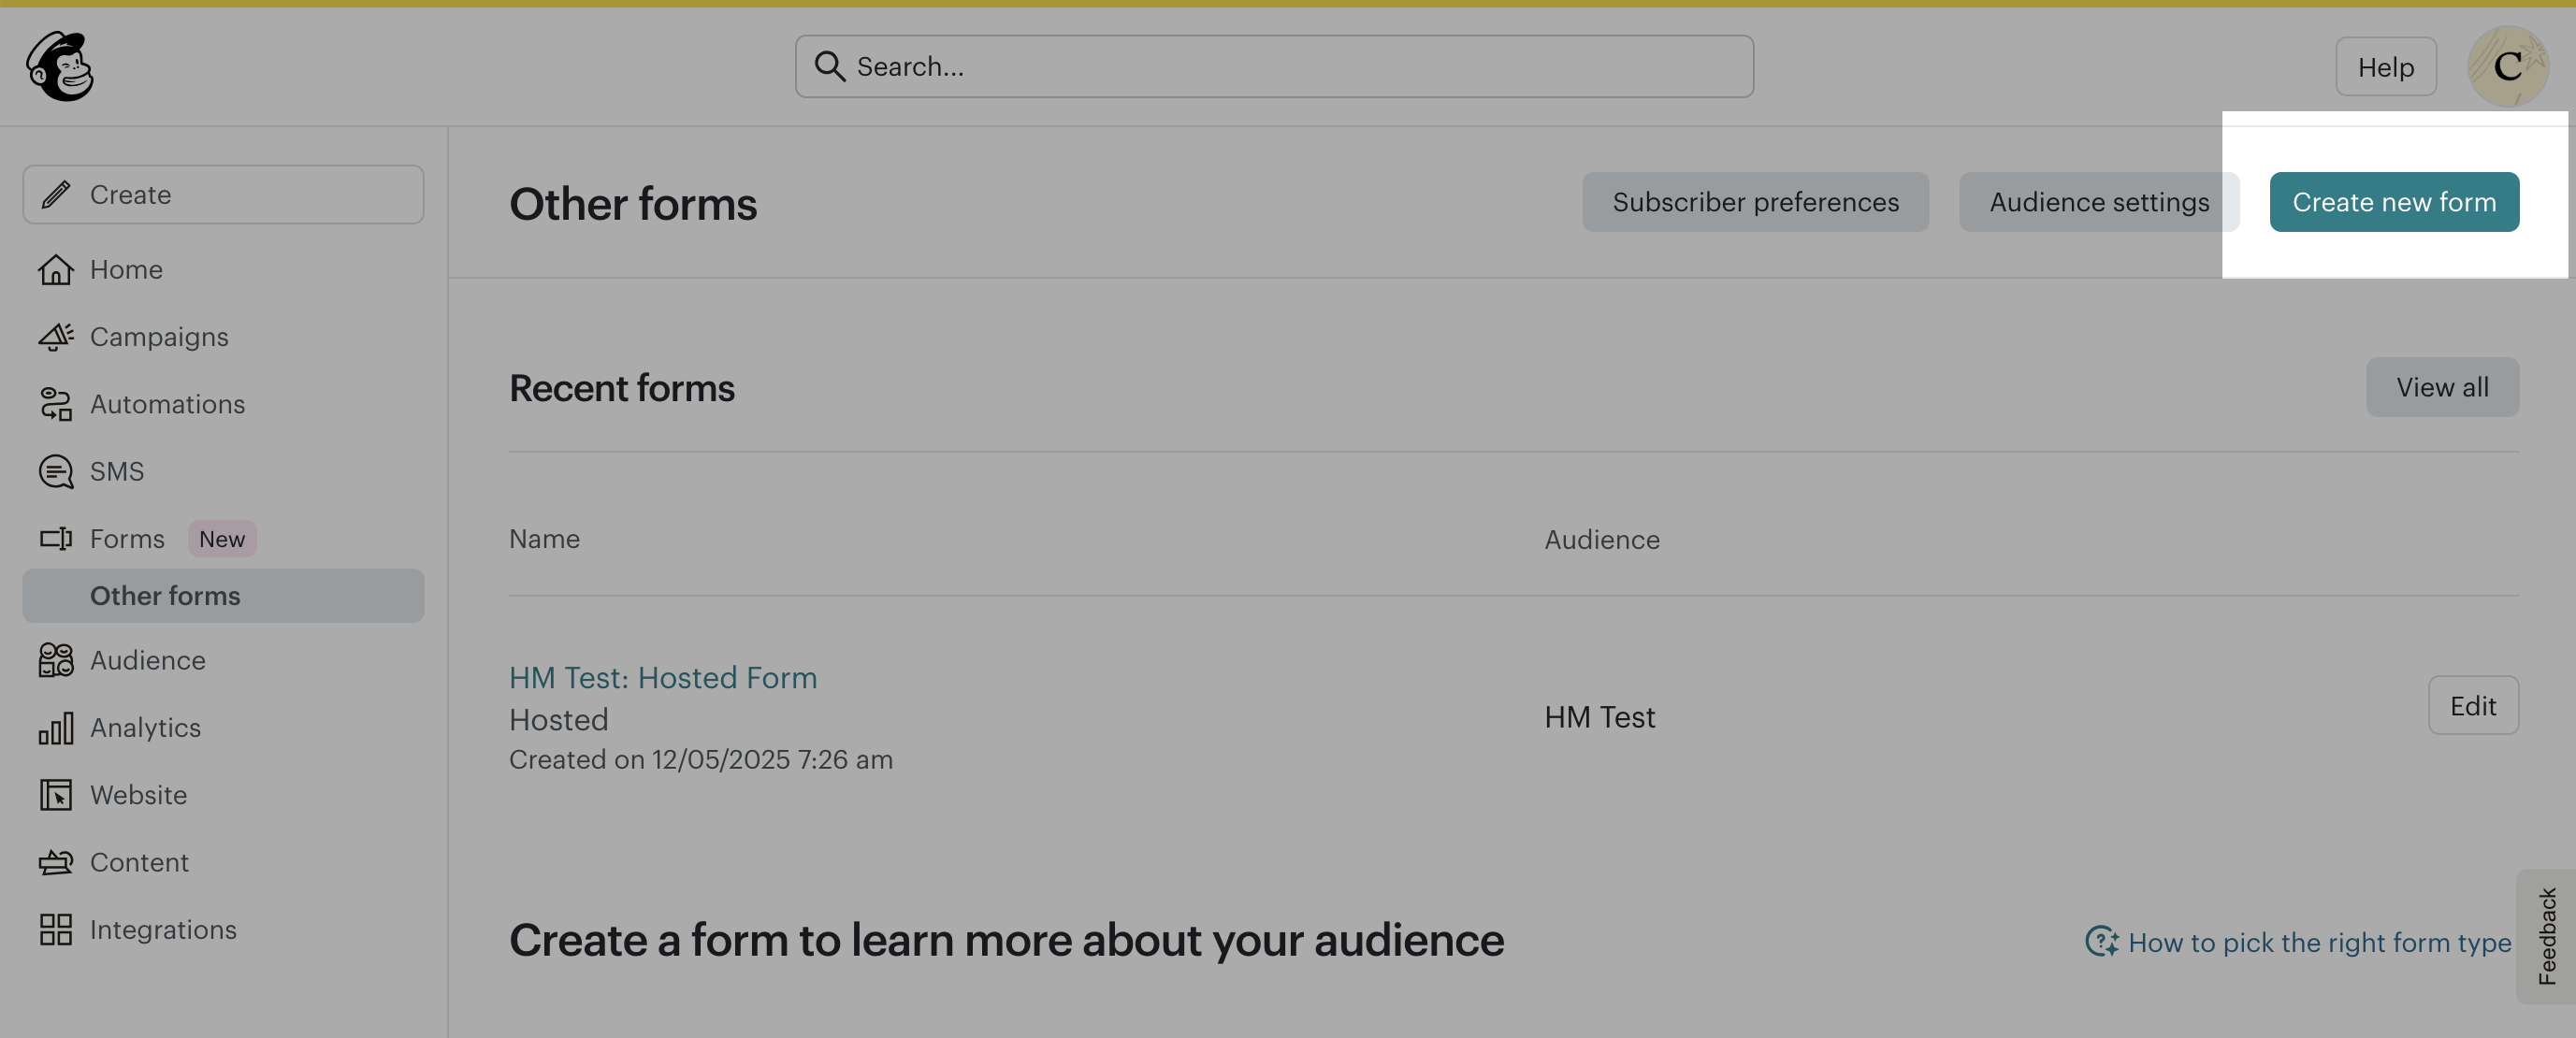
- Log into Mailchimp and on the left sidebar, click on Forms, then click Other Forms
-
Click Create New Form
-
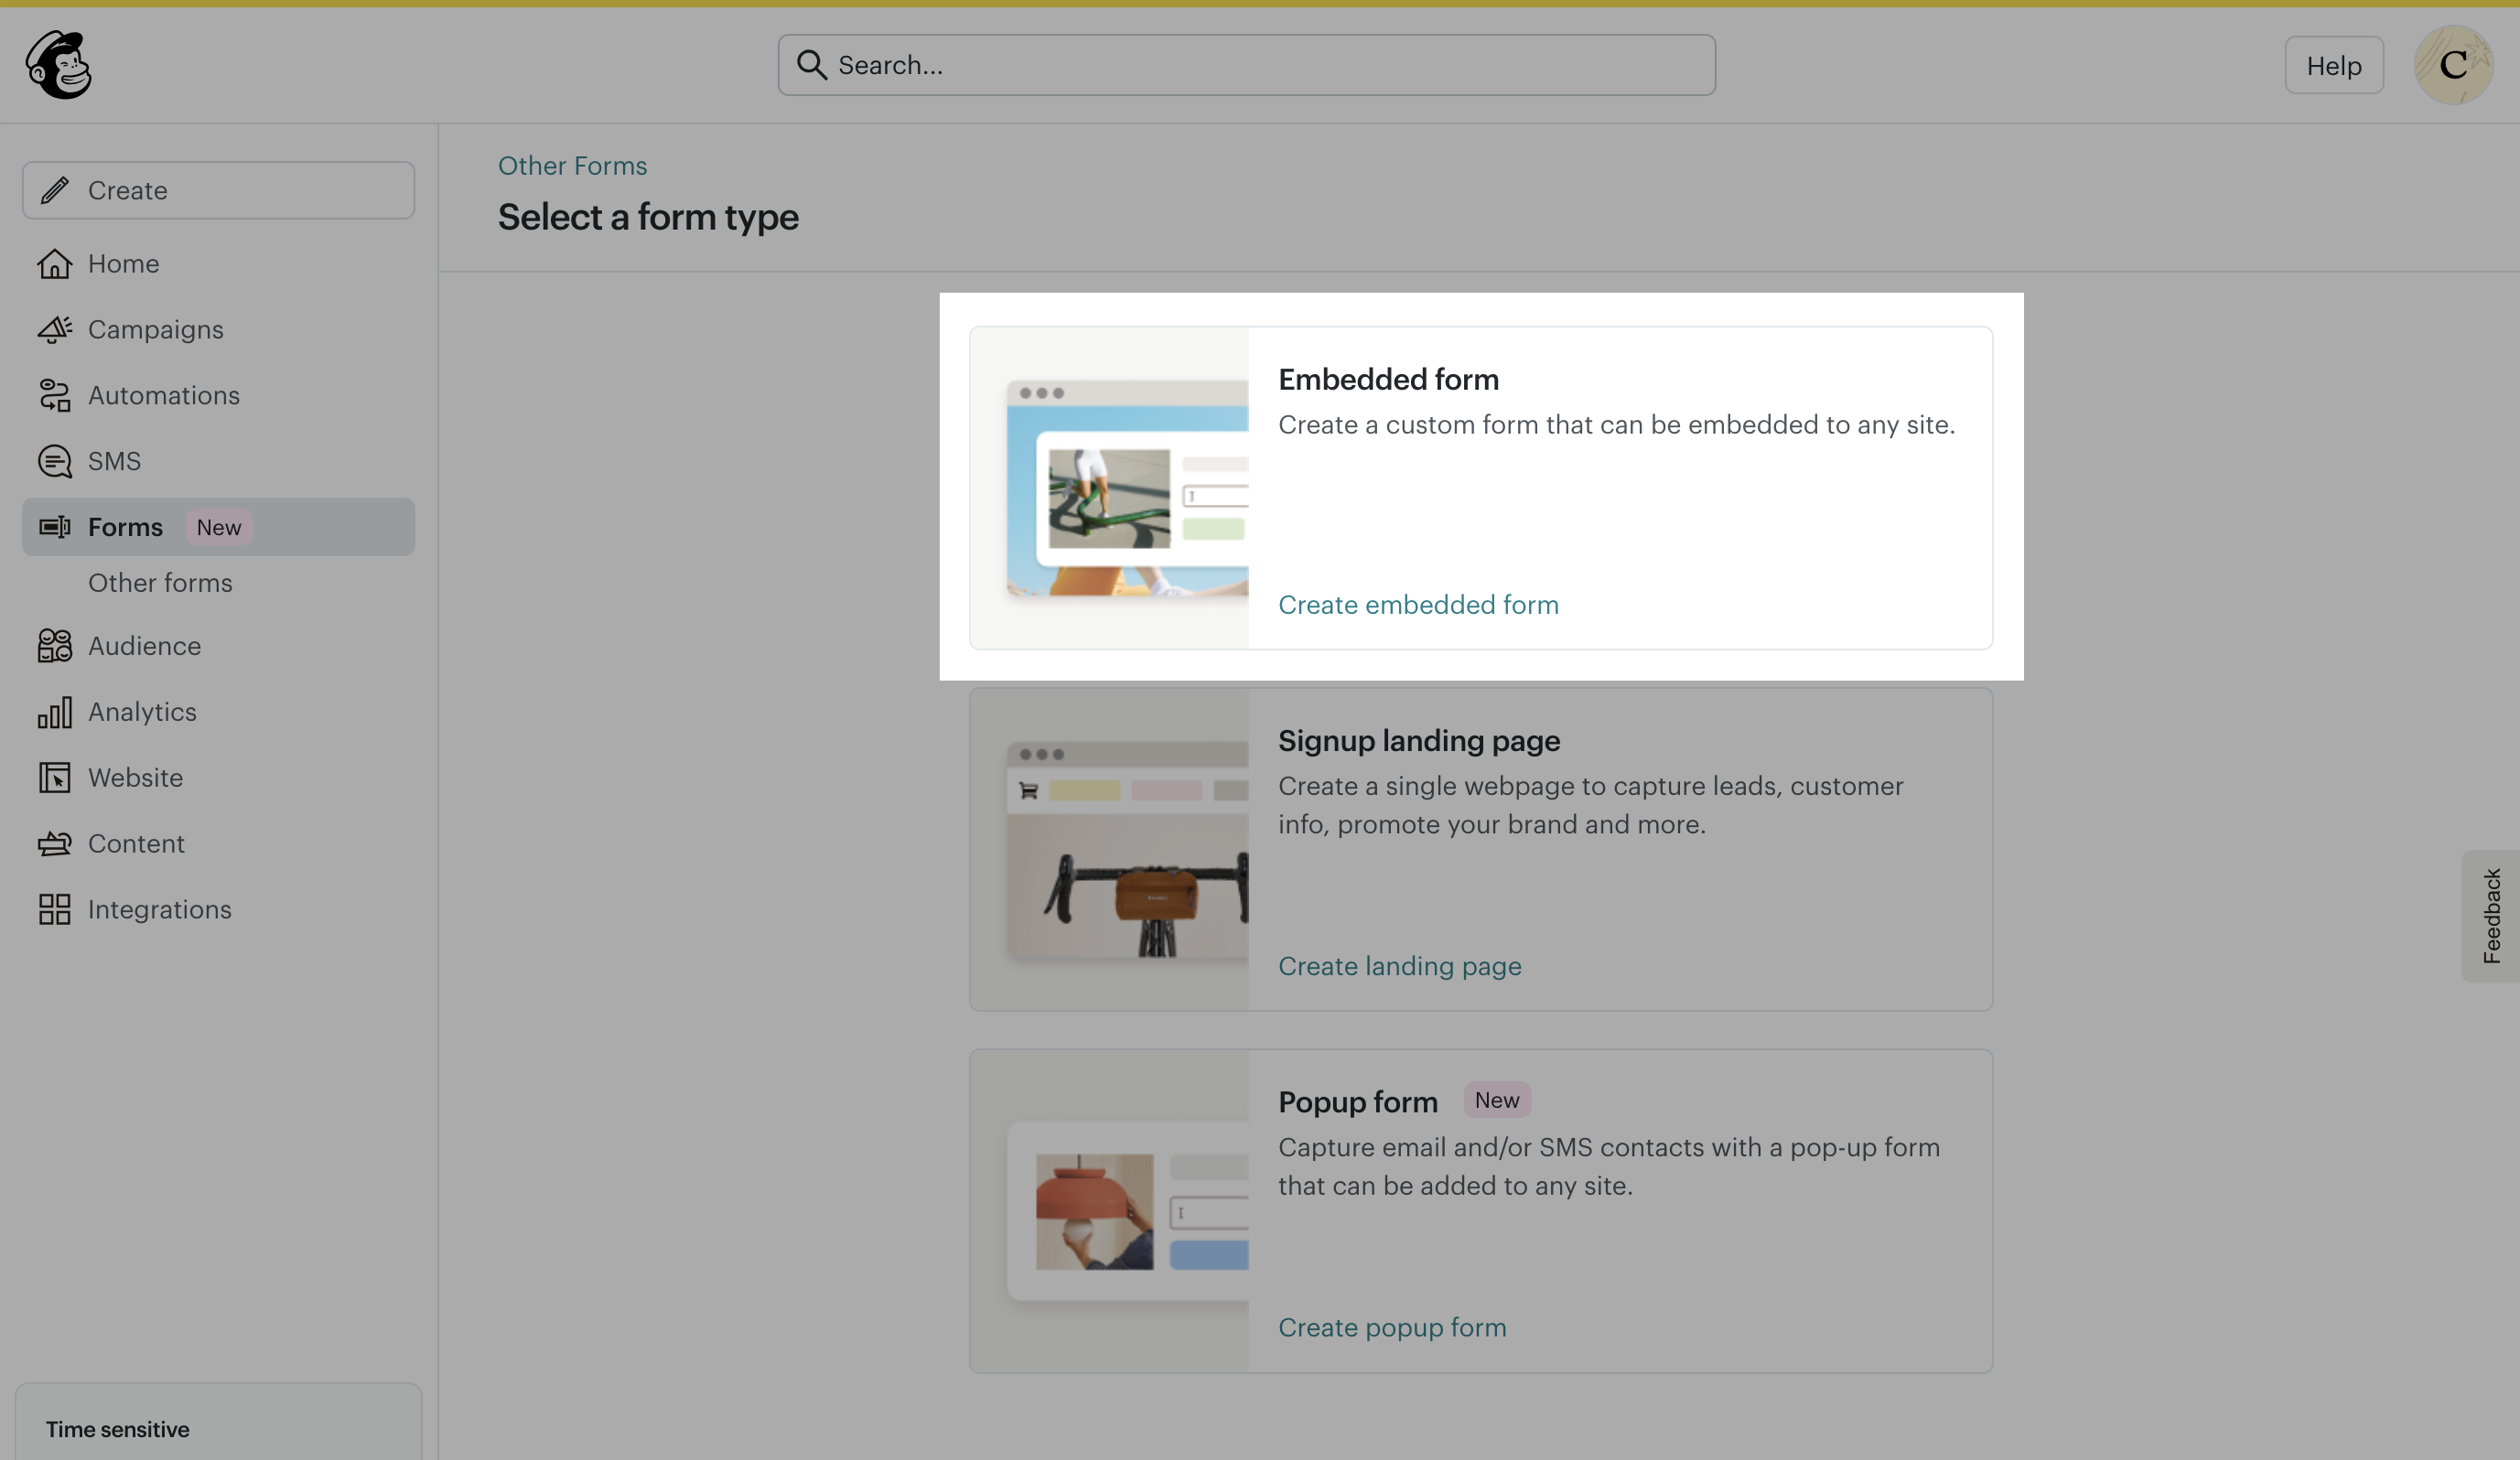
You'll see a few different form options here. Click Embedded Form
-
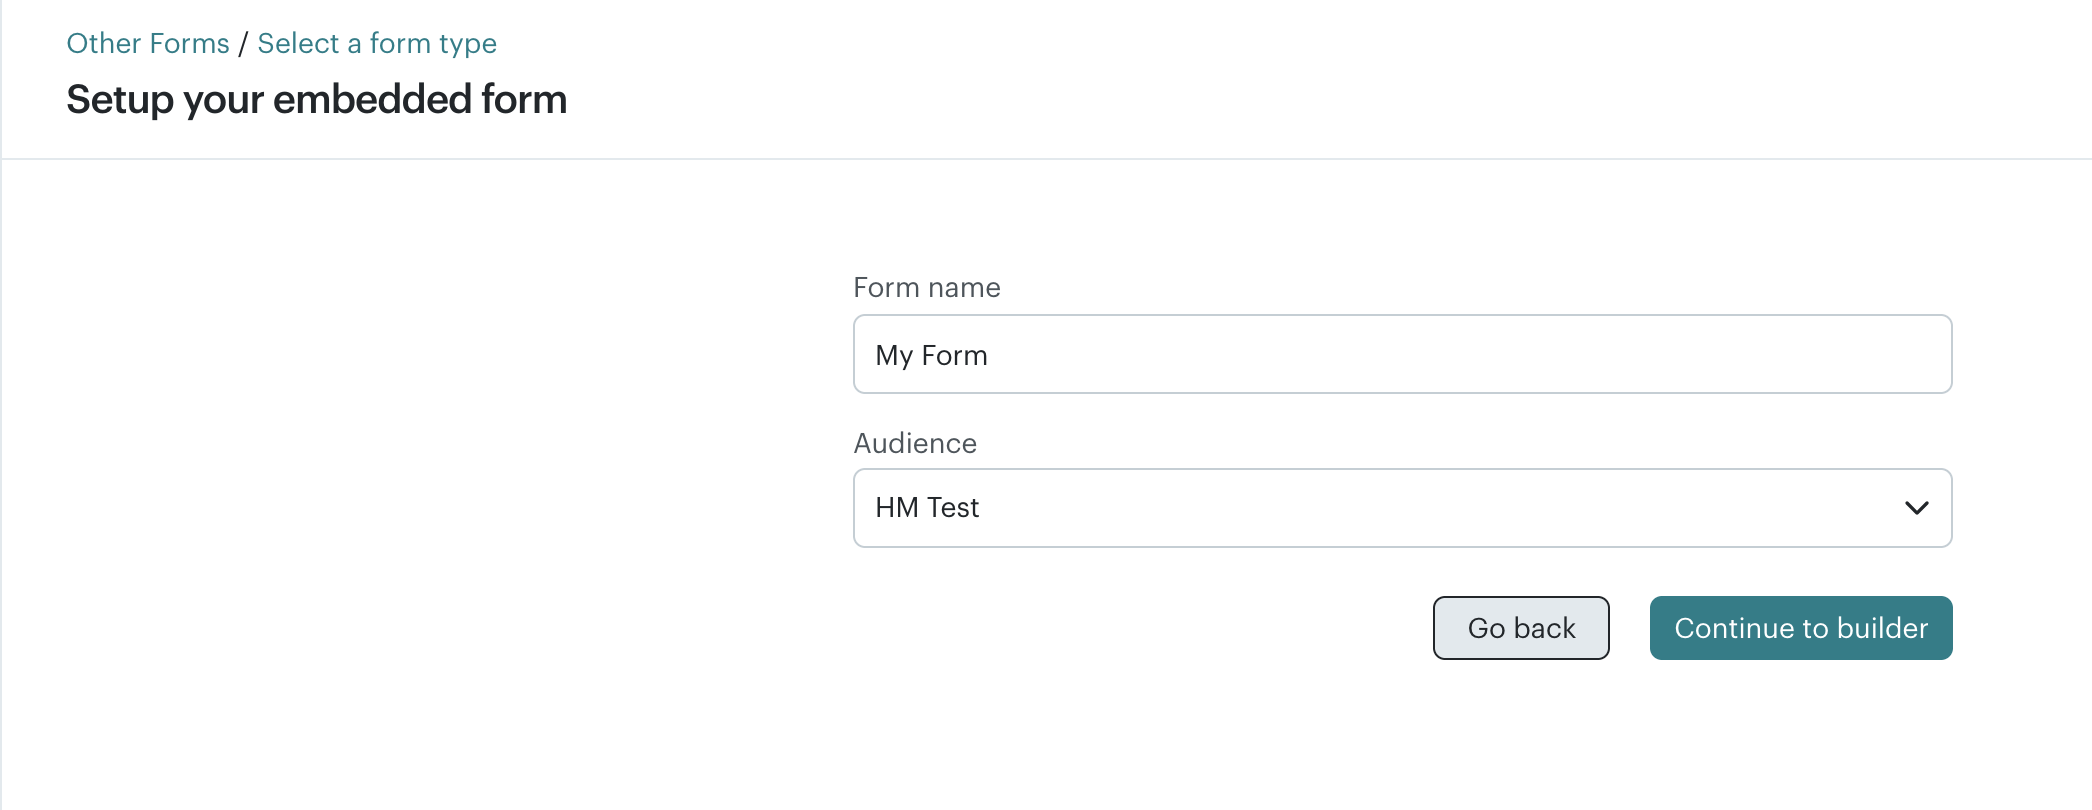
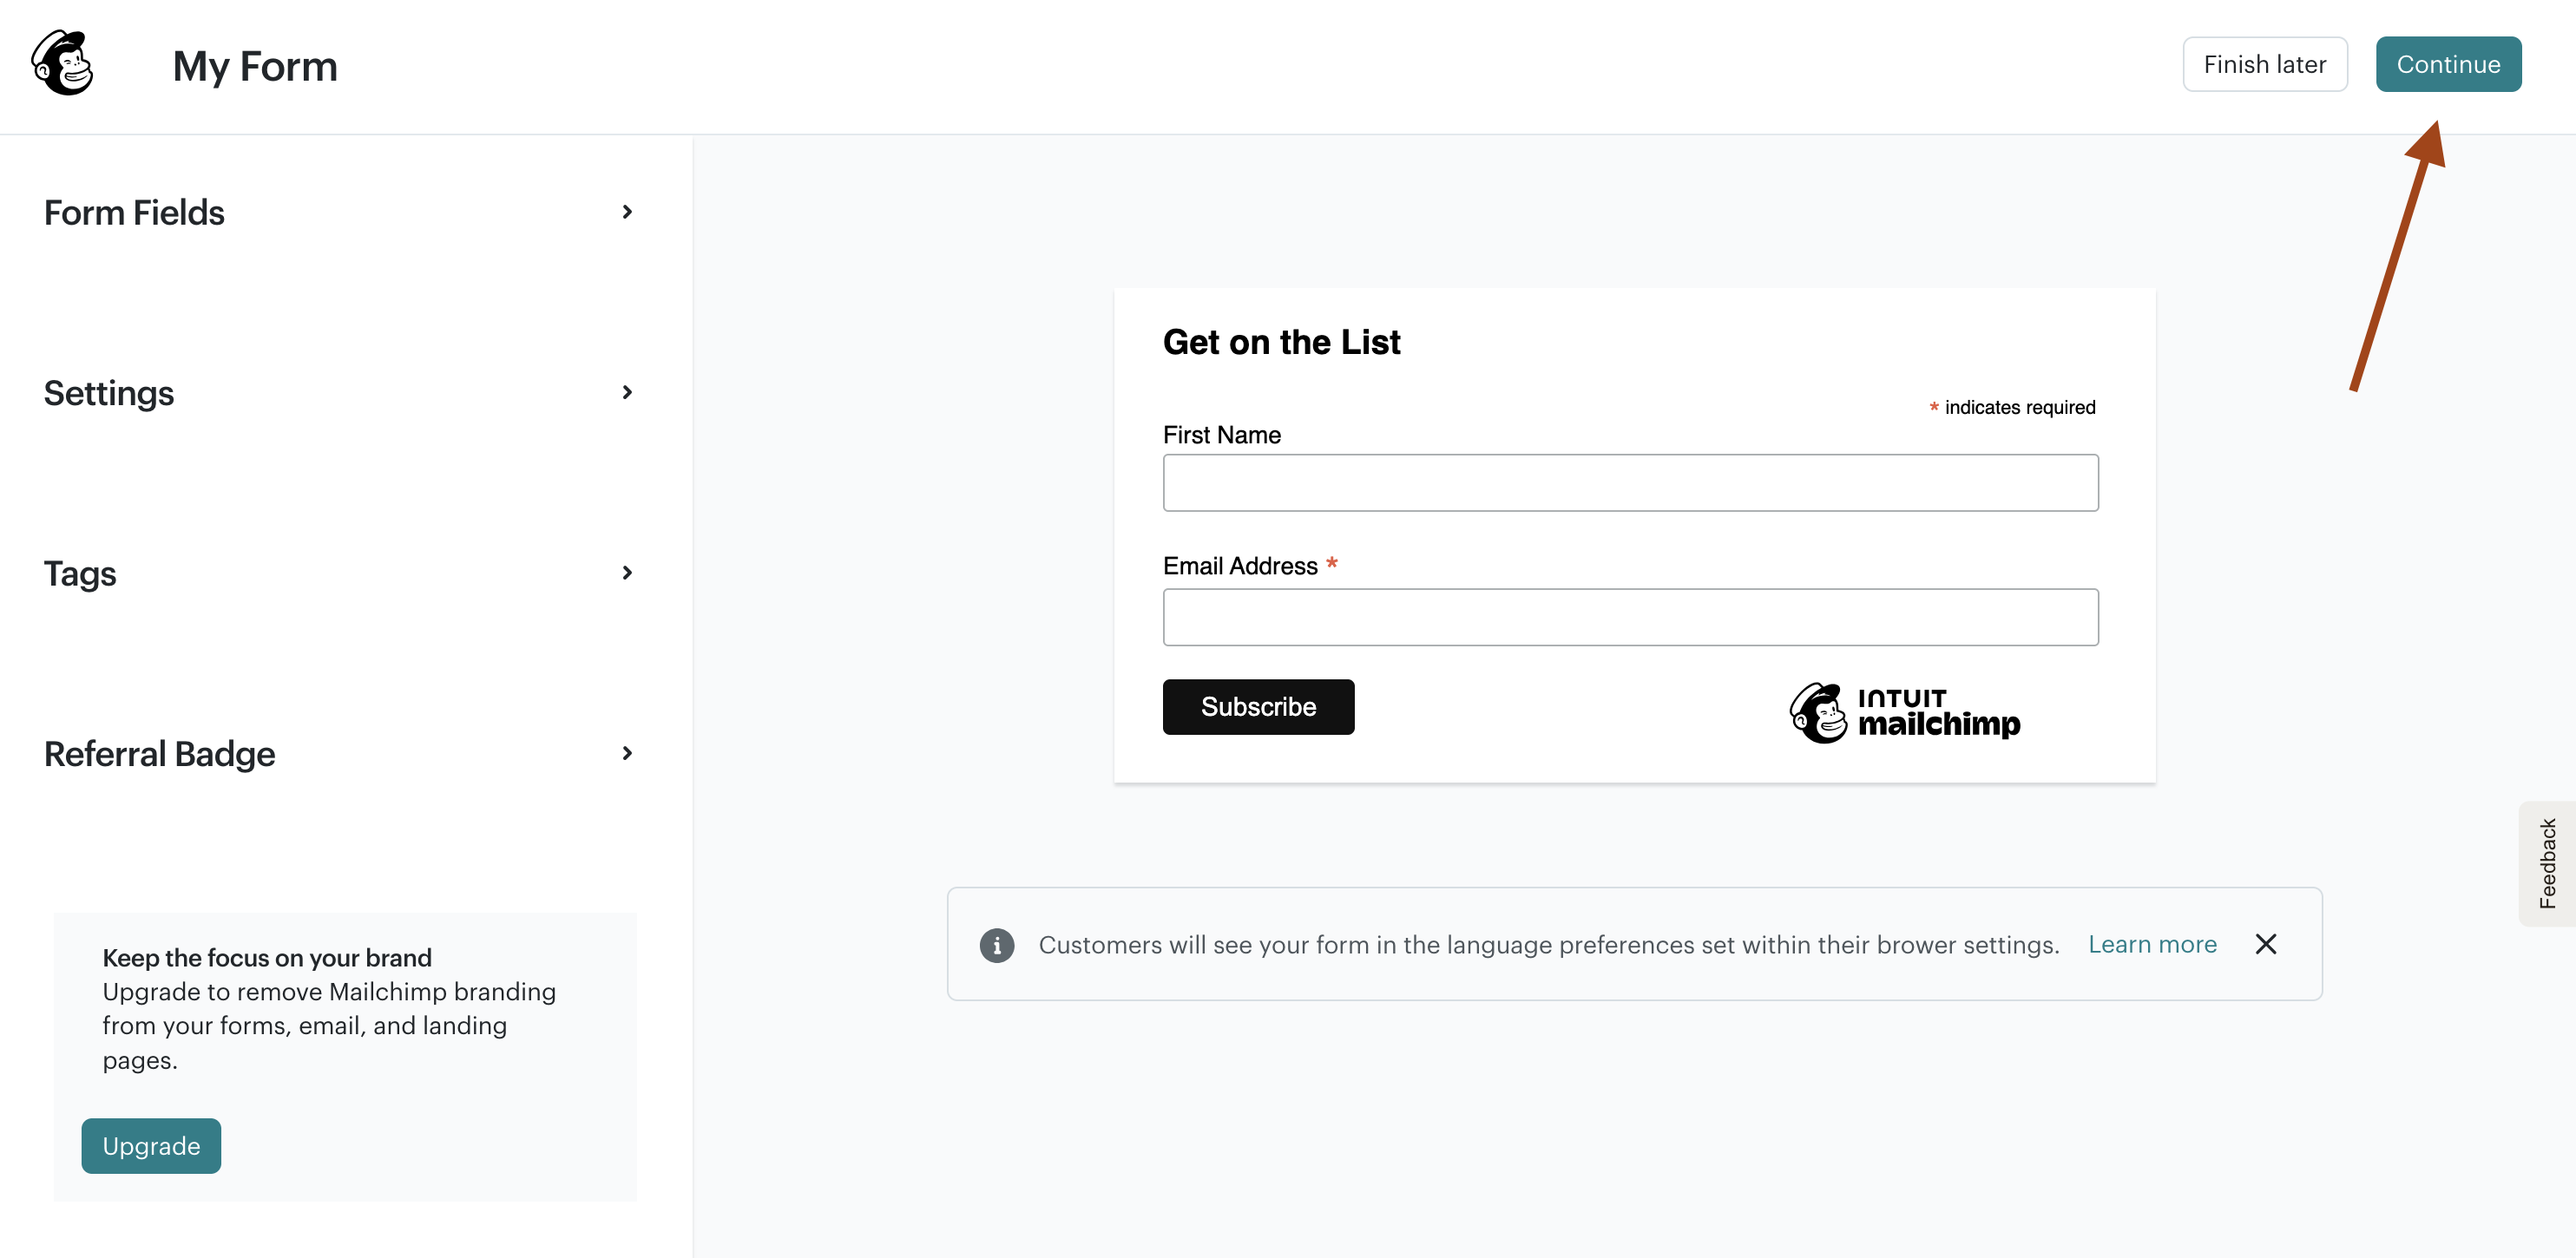
Give your form a name and select your audience from the dropdown, then click Continue to Builder
-
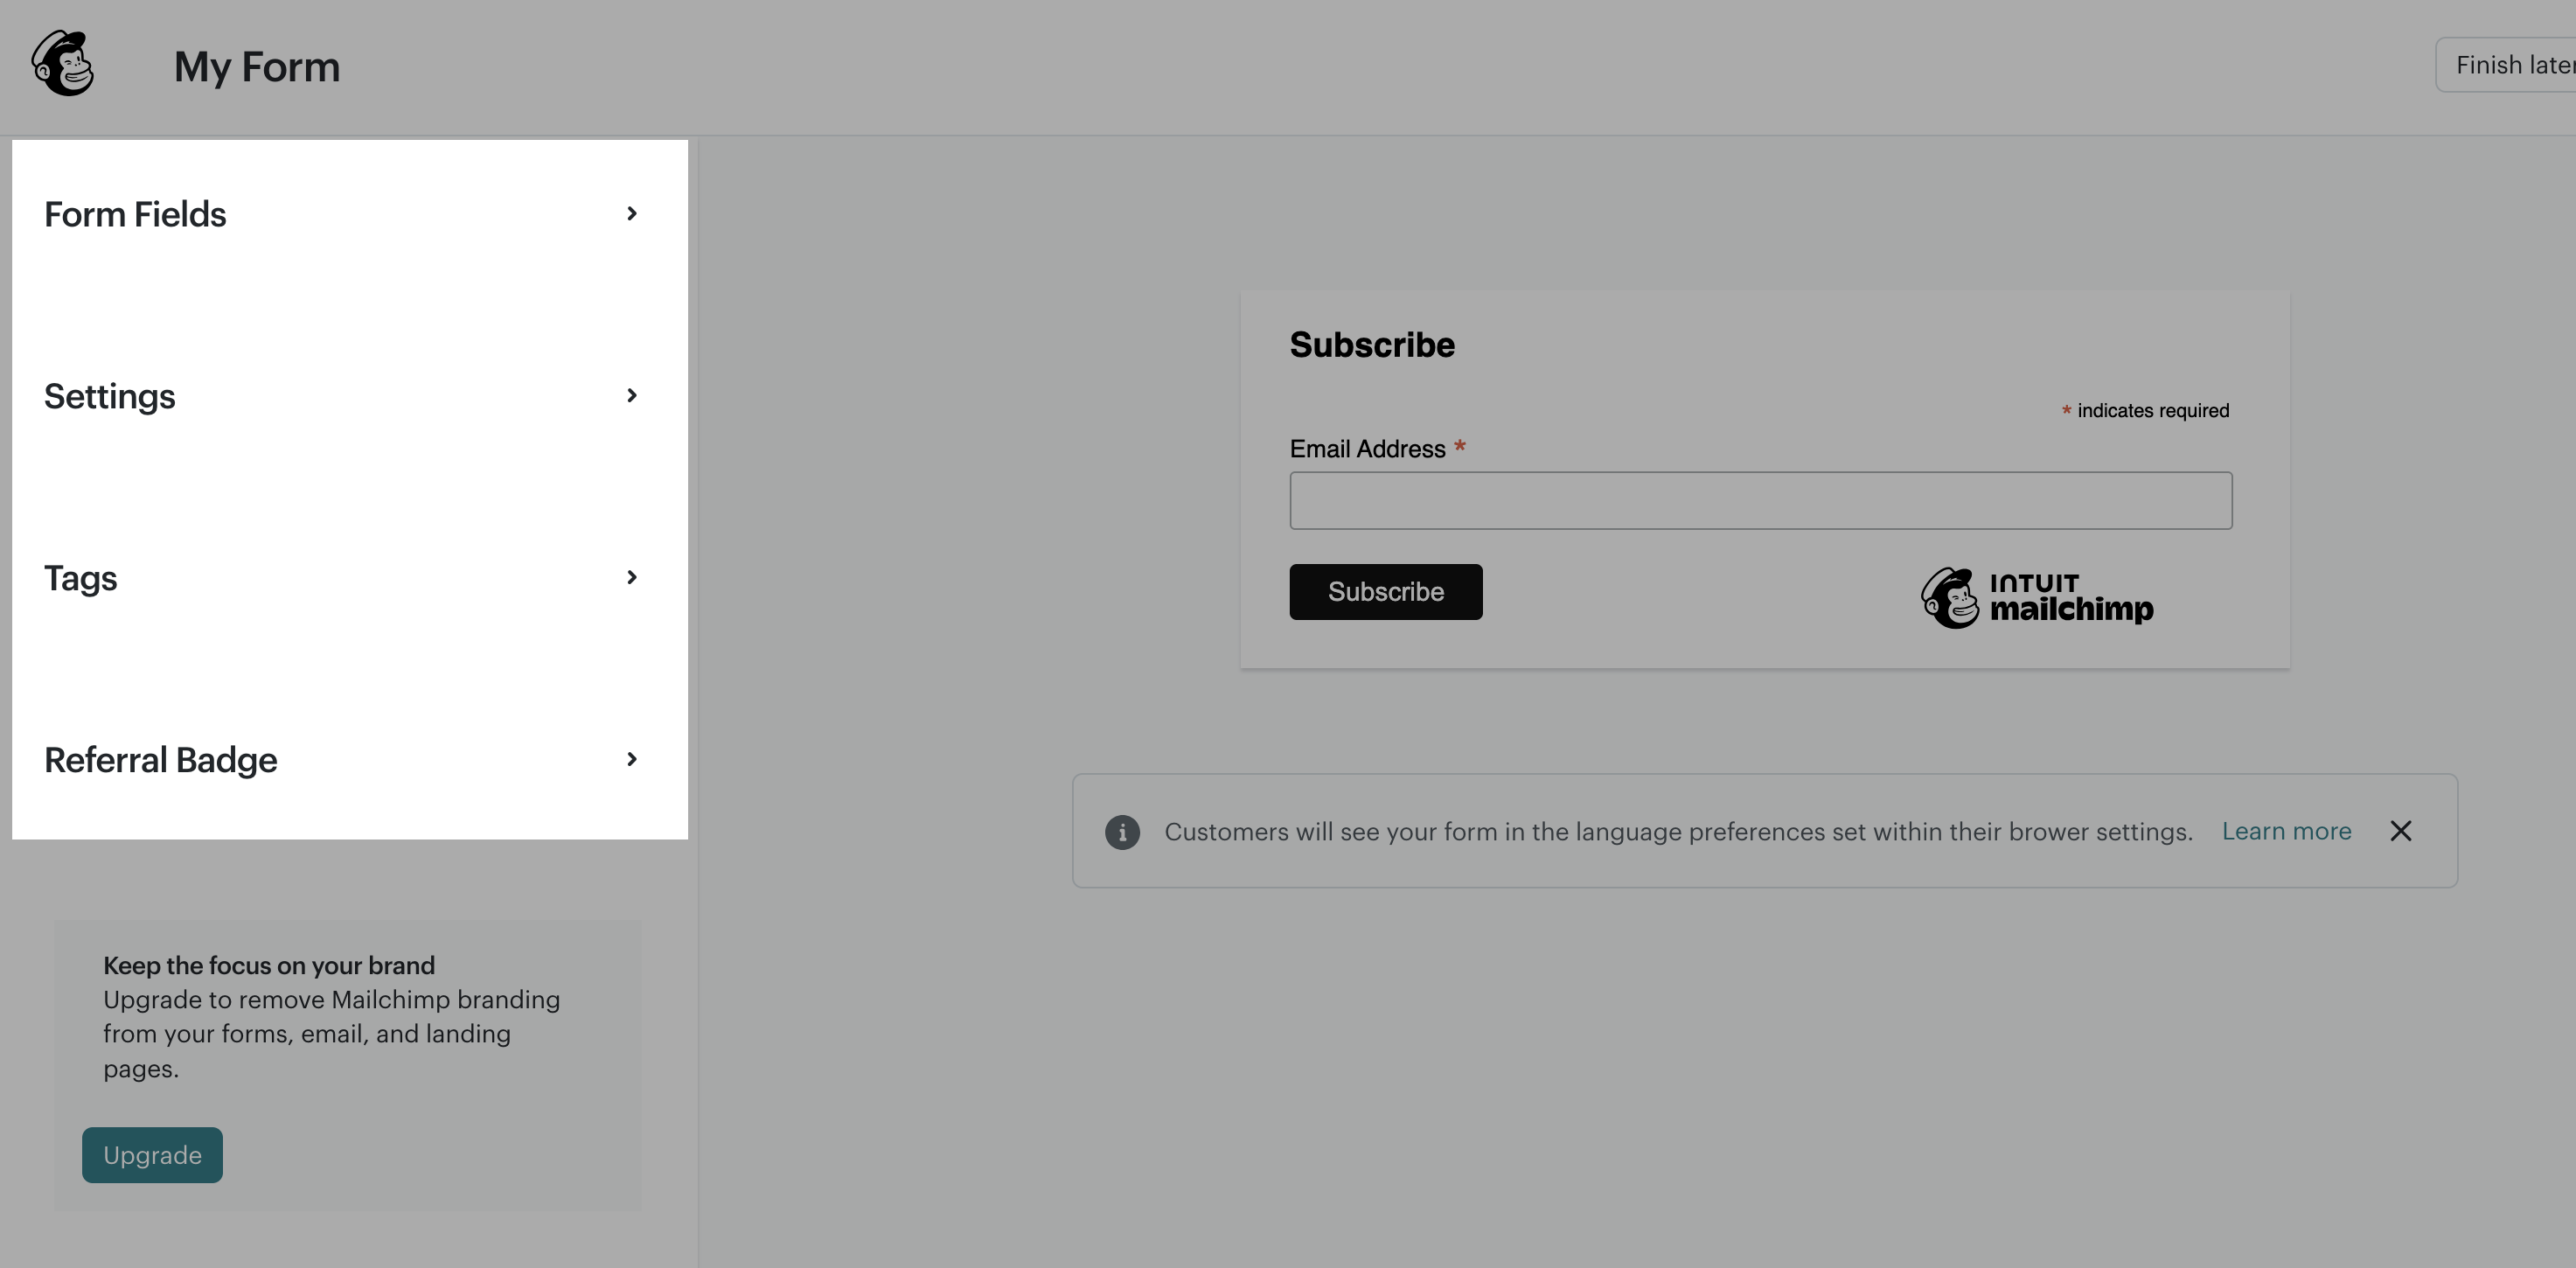
In this next screen, you'll find some form settings on the left side. You can learn more about these settings here.
-
As you adjust the settings, you'll see the live changes to your form on the right side. When you're finished making adjustments, click Continue.
-
Copy the code you've been given
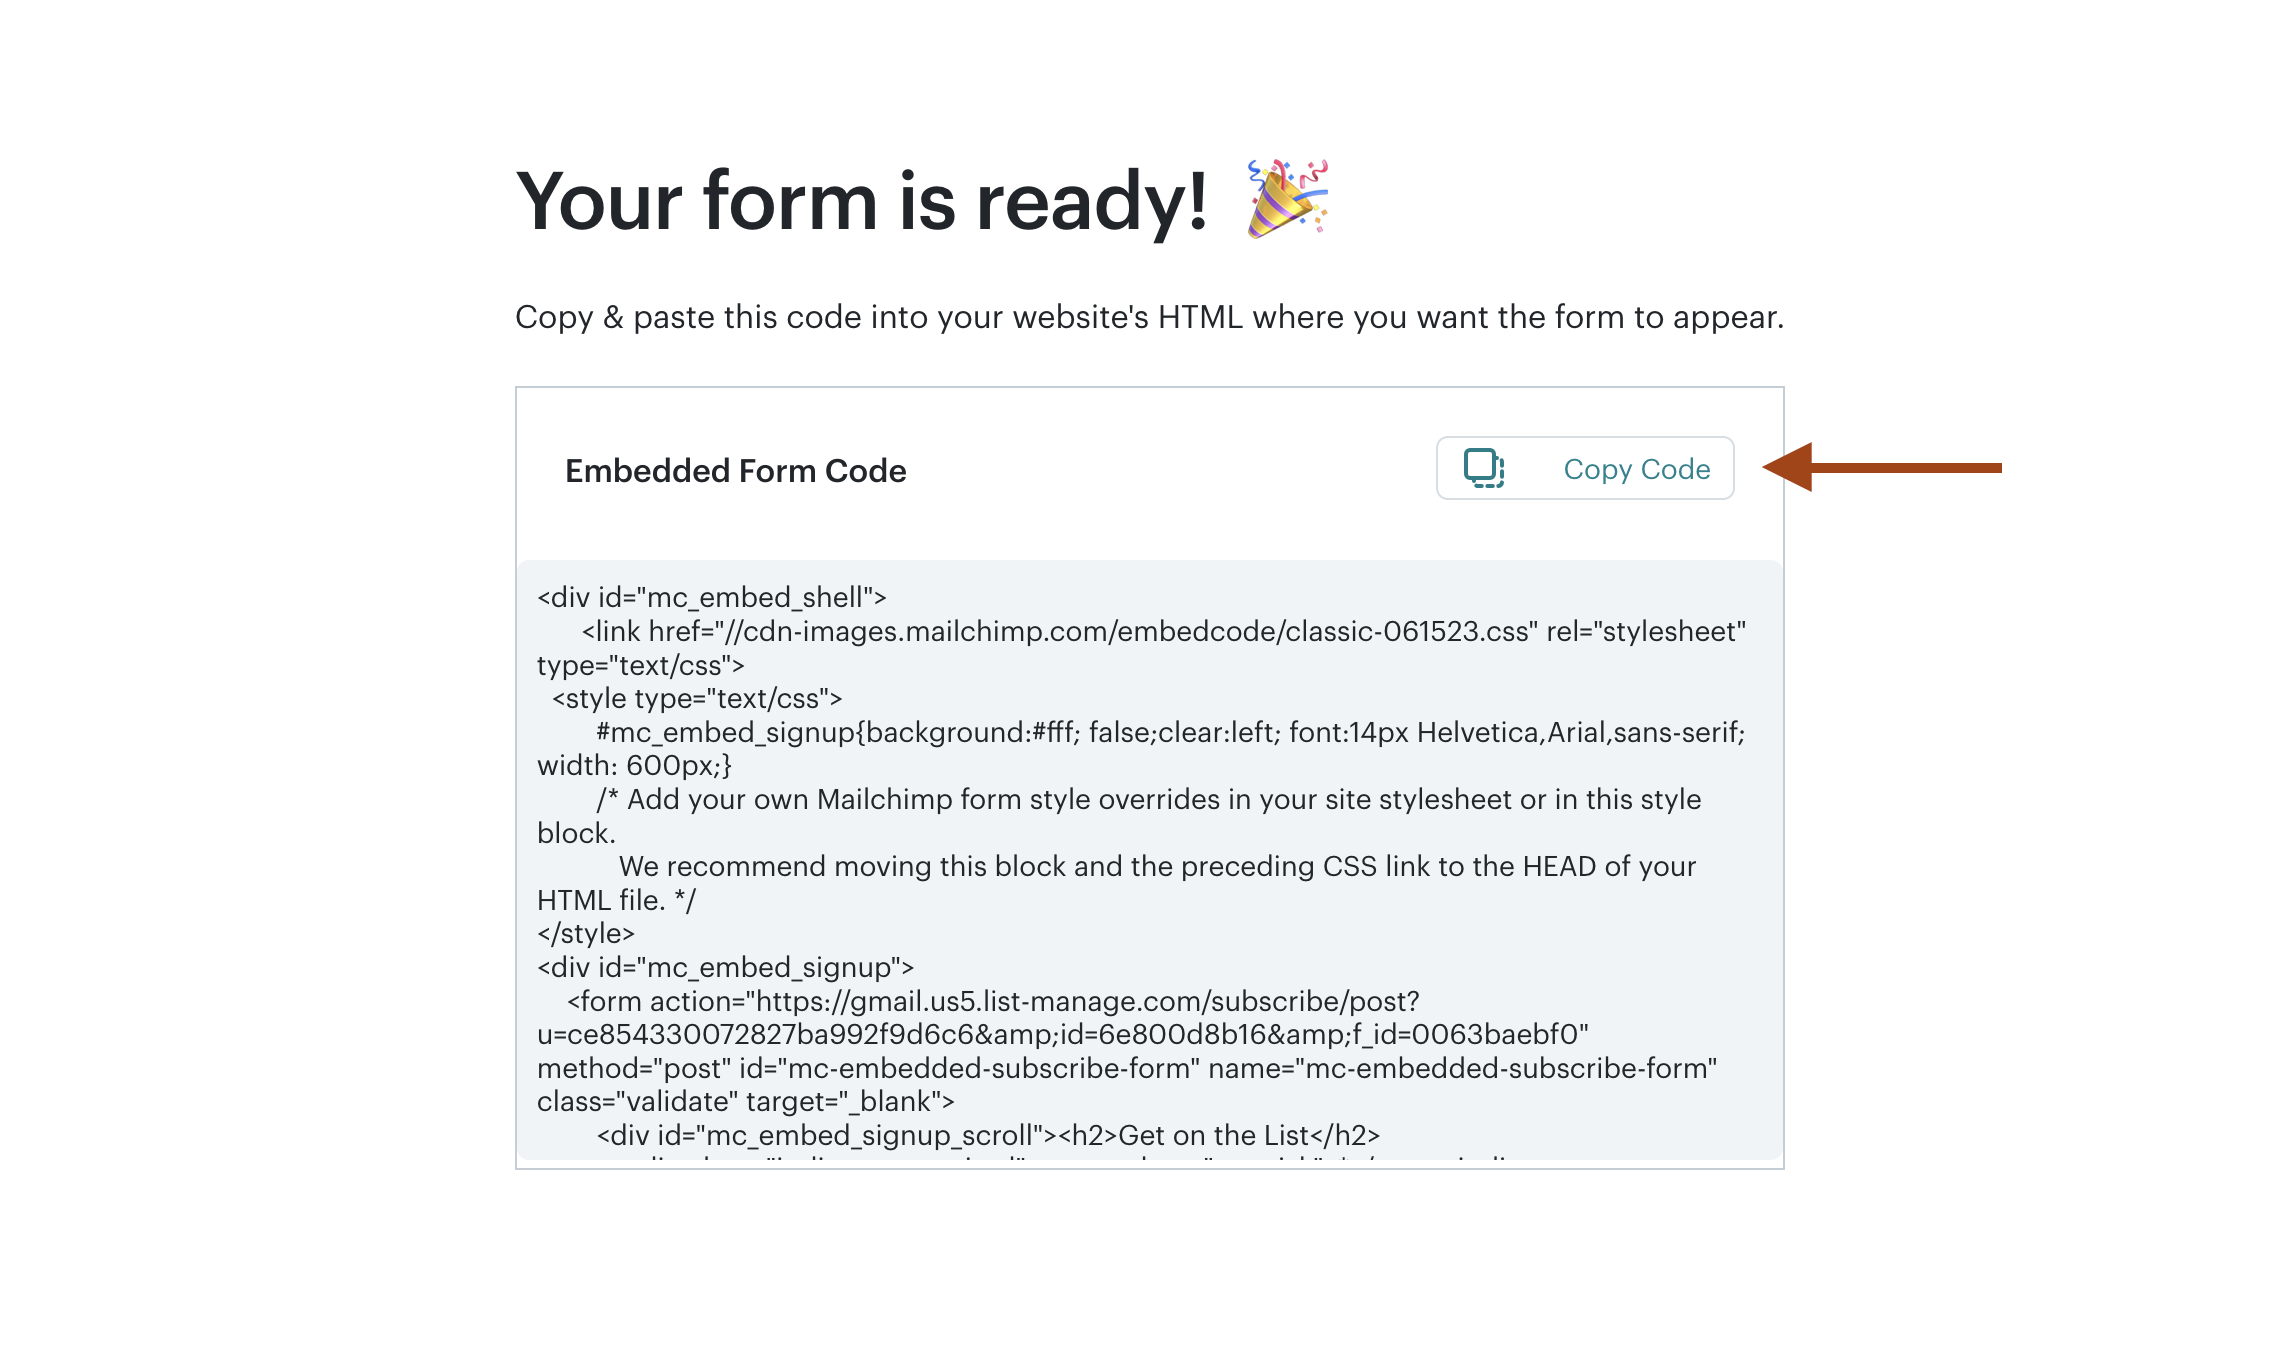
- In WordPress, navigate to the page editor where you want to add the form and find the HTML block. (You can also add your own HTML block anywhere you want by clicking the + sign in the upper left.)
-
Replace the ENTIRE demo/fake code with the code you just copied from Mailchimp. It should end up looking like this:
- Save the page and view the live site (the "preview" doesn't always show it exactly). You should now see your form working on your site.
-
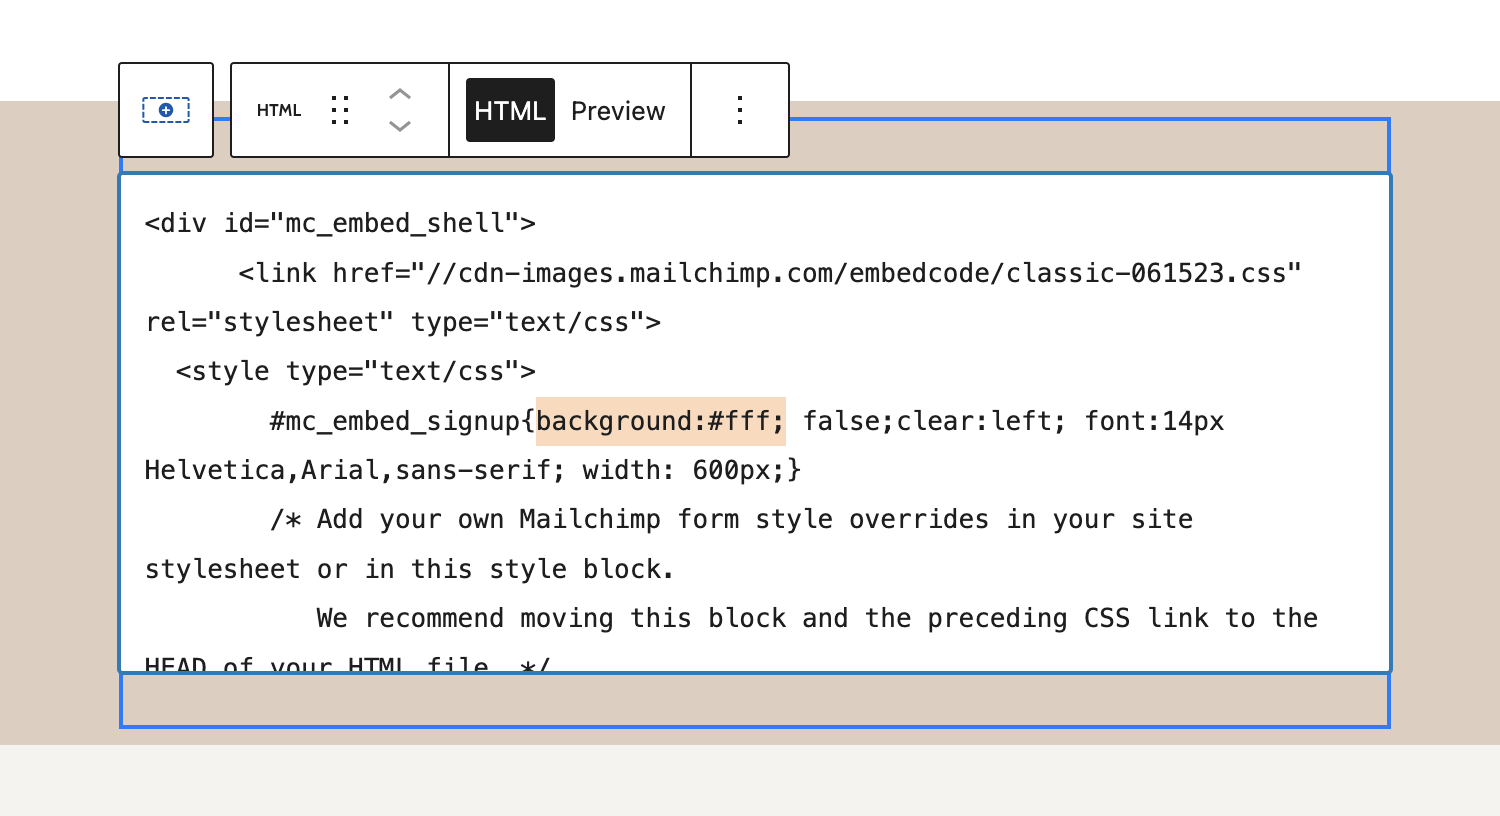
Optional: You can remove the white background by deleting background:#fff; (found at the top of the code, see image below)
- Customization tip: If you want a horizontal form, you can use this CSS snippet. Go to Appearance > Customize > Additional CSS and paste in the following code:


#mc_embed_signup {
width: 100% !important;
max-width: 100% !important;
box-sizing: border-box;
}
#mc_embed_signup #mc_embed_signup_scroll {
display: flex;
flex-wrap: wrap;
align-items: flex-end;
gap: 0.5rem;
}
#mc_embed_signup #mc_embed_signup_scroll > h2,
#mc_embed_signup #mc_embed_signup_scroll > .indicates-required,
#mc_embed_signup .optionalParent p {
display: none;
}
#mc_embed_signup #mc_embed_signup_scroll > .mc-field-group {
flex: 1 1 0;
margin: 0;
}
#mc_embed_signup #mc_embed_signup_scroll > .mc-field-group input {
width: 100% !important;
box-sizing: border-box;
}
/*
 *
 * CHANGE BUTTON STYLES UNDER HERE
 *
 *  */
#mc_embed_signup .optionalParent .button {
white-space: nowrap;
padding: .55rem 1.5rem;
height: 100%;
margin: 0;
font-size: 12px;
background-color: #232323;
color: #ffffff;
}
#mc_embed_signup .mc-field-group {
padding-bottom: 0 !important;
}
#mc_embed_signup #mc_embed_signup_scroll > #mce-responses {
order: 2;
flex: 0 0 100%;
}
#mc_embed_signup #mc_embed_signup_scroll > [aria-hidden="true"] {
order: 3;
flex: 0 0 100%;
}
#mc_embed_signup #mc_embed_signup_scroll > .mc-field-group label {
display: block;
font-size: 11px;
}
@media (max-width: 600px) {
#mc_embed_signup #mc_embed_signup_scroll {
flex-direction: column;
gap: 0.5rem;
}
#mc_embed_signup #mc_embed_signup_scroll > .mc-field-group,
#mc_embed_signup #mc_embed_signup_scroll > .optionalParent {
flex: 0 0 100%;
width: 100%;
}
#mc_embed_signup .optionalParent .button {
width: 100%;
}
}
Change background-color: #232323; and color: #ffffff; to whatever button colors you'd like.
Option 2: Use a plugin
Another way to set up a signup form with Mailchimp is to use the MC4WP: Mailchimp for WordPress plugin. There are no customization options, but your form will inherit more of your theme styles so it will at least match your site better than option 1!
The downside to using the plugin method is that you can only use one form throughout your site. You'll need their premium add-on if you want to be able to create more than one type of form.
Step 1: Navigate to Appearance > Plugins and search for MC4WP. Install and activate the plugin.

Step 2: In the WordPress dashboard sidebar, click on MC4WP and follow the instructions to create the API Key to sync your Mailchimp account with the plugin. Just click Get your API key here > scroll down a bit and click Create A Key > copy and paste the key into the API Key field. Save changes.


Step 3: In the WordPress sidebar under MC4WP, select Form
Step 4: Give the form a title
Step 5: Select your account, and click Add New Form.

A screen similar to the image below will automatically open:

Step 6: Under the “Form Code” field, remove that content and replace it with this:
<p>
<label>
<input type="text" name="FNAME" placeholder="First Name" />
<input type="email" name="EMAIL" placeholder="Email Address" required />
<input type="submit" value="Sign up" />
</label>
</p>
(You can adjust the button text by changing "Sign up" to "Subscribe" or whatever you'd like!)
Step 7: Copy the form shortcode and paste into a notepad/notes app because you will need it for Step #10!

Step 8: Save the form. We're done with this part!
Step 9: TIP: If you want the form to be vertical where the fields are stacked on top of each other instead, navigate to Appearance > Customize > Additional CSS and copy/paste the css below and save:
.mc4wp-form-fields input{margin: 0 0 5px;width: 100%;}
Step 10: Now, go back to your dashboard and go to Pages > Edit the Homepage (or whichever page the form is displayed), scroll down to the block that has the demo code, and replace that entire demo code with the shortcode you copied from step #7. It'll look like this:

That's it – save the page!
Step 11: Lastly, don't forget to update your MC4WP form settings. Just click the Settings tab.

That's it – you're done! Make sure to test your form out.